2.5. DomiSMP user interface overview and user settings
2.5.1. Purpose of this guide
This document is designed for new users of DomiSMP, providing a clear overview of how to navigate the user interface (UI) and manage settings. We recommend reading through this guide from start to finish to gain a comprehensive understanding. If you’re already familiar with some parts, feel free to jump to the sections that interest you.
2.5.2. Introduction
DomiSMP combines a document repository with a straightforward text editor. The UI is divided into a tool sidebar on the left and a main workspace on the right, designed for simplicity and ease of use.
2.5.3. Layout
DomiSMP features a simple layout:
-
Collapsible sidebar (A) that contains tools and views.
-
Breadcrumb bar (B) that displays your current location in the application.
-
Top bar © with login status and menu.
-
Main workspace (D), where you edit documents (resources/subresources) and configure entities.
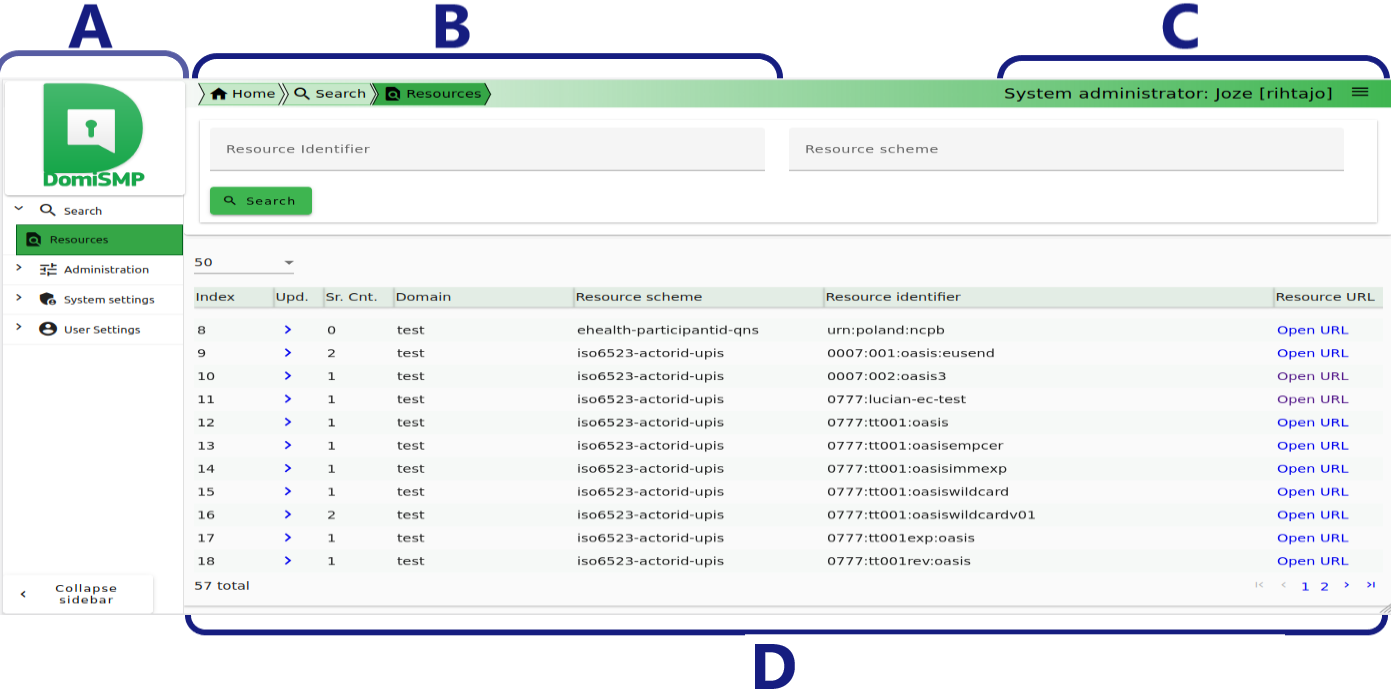
2.5.3.1. Sidebar

The sidebar is your primary navigation tool, offering:
-
Search: Find resources within DomiSMP. The tool is visible to all users.
-
Administration: Manage domains, groups, and resources (for logged-in users).
-
System Settings: Accessible by system admins for DomiSMP configuration.
-
User Settings: Personalise the look and feel, as well as modify your UI preferences and credentials. It’s visible only to logged-in users.
2.5.3.2. Breadcrumb bar

The breadcrumb bar at the top helps you navigate your current location, making it easier to move between resources.
2.5.4. User settings
User settings allow you to personalise your DomiSMP experience, including your name, email, theme, and credentials.
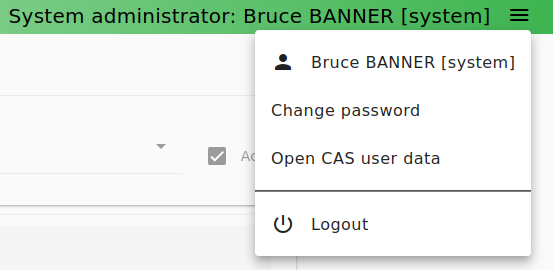
For user preferences, click the hamburger menu on the top bar and select User, or click User Settings (see the image (1) below) on the left sidebar.

2.5.4.1. Profile
In the Profile section, you can:
-
View Account (2) info: See your username and role. Only System Admins can modify this information.
-
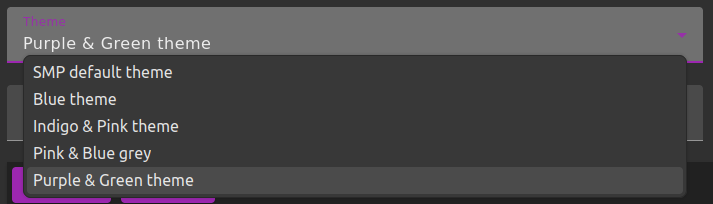
Customise your User profile (3): Change your name, email, theme (choose between the light themes: SMP Default, Blue, Indigo & Pink theme, and dark themes: Pink & Blue grey and Purple & Green theme), and locale. Confirm changes by clicking the the Save button.
-
Change your Username/password credentials (4): This section allows you to change the password.
2.5.4.2. Access tokens

Use access tokens for REST API access. Create, edit, or delete tokens.
To generate an access token, click Create access Token. Note that the full access token is only shown once and it’s not possible to retrieve it again.
The description and validity period are editable; to confirm changes, click the Save button. If an access token is expired, it can not be used for accessing the REST API and you see a warning bar over its name.
To delete an access token, click the Delete button.
2.5.4.3. Certificates

X.509 certificates are used for TLS authentication and authorisation for REST API access.
To upload a certificate, click Import new certificate.
The description can be updated; to confirm changes, click the Save button.
To see certificate details, expand the certificate tab and click the Show Details button. If a certificate is expired, it can not be used for accessing the REST API and you see warning bar over its name.
To delete a certificate, click the Delete button.
